Warning: mkdir(): No such file or directory in /var/www/vhosts/oneidatrail.com/httpdocs/app/plugins/photo-gallery/framework/BWGOptions.php on line 371
Chris Cimino, Author at Oneida Trail - Page 4 of 6
Menu

Establishing a Garden

<img class="wp-image-637 size-full" src="http://www.oneidatrail find out here now.com/app/uploads/2014/04/garden-pic.jpg” alt=”” width=”863″ height=”421″ srcset=”http://www.oneidatrail.com/app/uploads/2014/04/garden-pic.jpg 863w, http://www.oneidatrail.com/app/uploads/2014/04/garden-pic-300×146.jpg 300w” sizes=”(max-width: 863px) 100vw, 863px” />
Garden Established

Garden Resurgence

Soul-comfortingly, we reinstated garden space where my grandmother used to have her garden. Constantly, I’m drawn back to the skills and homesteading choices of her generation. Where did so many baby-boomers and Generation X people go wrong? Oh yea…selling method marketing began in their generations.

Poop Panic

With a truckload of raunchy smelling horse manure, Michelle stares wide-eyed at Chris and says, “We got to dump this in the woods.”

Materials List:

  • Framing Lumber: 2x6s: Cedar, un-treated & rot resistant… or not or Hugelkurtur beds
  • 25 Exterior screws: 3”
  • Soil: Green Compost, Municipality’s Compost, Local Manure
  • Fence Posts
  • Rabbit or Deer Fencing
  • Cardboard

Tools:

  • Drill/Impact Driver
  • Measuring Tape
  • Cutting Saw: circular saw, miter saw, etc.
  • Level

Game Plan:

  • Use un-treated wood: cedar would be nice…
  • Provide protection (grid setup easy to fence in)
  • As beginners, have a large but manageable space
  • Use raised beds: neat, provides moisture retention, easy planning
  • High sunlight location during the day
  • Mostly leveled surface
  • Four raised beds: 4’ x 10’

Savvy Salvaging

First, we scored some old framing lumber from Pa. He assured us it wasn’t pressure treated. They were pretty beat up non-cedar 2x6s, so they probably won’t last very long, but we couldn’t beat the “price.” After three seasons, they are still well in tact. We decided to create four 4’ x 10’ beds. Four foot is a little wide in retrospect; I’d go with 42” wide beds if I did it again.

Trick: Put cupcakes near garden bed project. Associate cupcakes with garden work.

In a maximized sun location, we setup a board and put the level on it to gauge the land’s tilt. It was tilted slightly, so we shoveled out one end a bit to get it close—we didn’t worry too much about being completely level. Then we drilled and screwed the boards into each other: two screws per joint.

Free Manure

On craigslist, we found someone giving aged horse manure for free with a nominal charge to dump it on your truck or trailer, so we borrowed pa’s truck and headed over. It turned out to be an old friend from high school, so the dumping of the shit was…free. =). Make sure the compost is aged for at least a year—two years to be safer. It was still really stinky, and we had a massive panic attack that we got the wrong stuff and almost tried to dump it in the nearby woods. Thankfully, it ended up working very well when we mixed it with peat moss and humus. Oh yea! Make sure you put, layer, and water down some cardboard to smother the grass before adding your soil. Don’t get tricked into buying fabric sheets.

We were weed-whacking the walkways for a while. This was dumb, so we layered wet cardboard then topped it with woodchips from our municipality’s composting service. It’s a nice organized look. Me likes!

Upgrades: Mulched walkways, fitted cold frames, and straw weed cover.

We initially didn’t plan on having a fence, but the rabbits struck quickly in the game, forcing us to reconsider. Deer are not an issue here, so we were able to buy some fence poles off of craigslist and bought some rabbit fencing from the hardware store. We haven’t had a problem since. The rabbit fence is short enough for us youngsters to hop over, but we did extend it in one area with a moveable stake that opens the area.

Haha, B!@#@! We win this time!

We changed from graph paper to garden bed pictures to organize our crop rotation and planting. Take pictures then crop and scale the images to one page. Then you can just write where and what you planted. We change pen color to delineate a different planting time in the season. Pictures are a great way to document your growing season and plant maturity rates during the year.
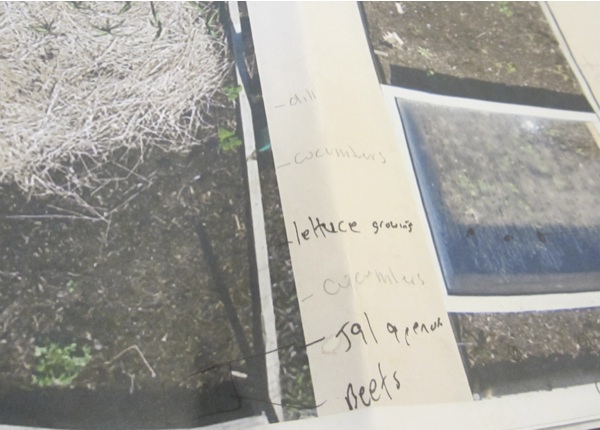
Use an image editor or Preview to document and manage your plantings.

This year, I let the chickens do some of the work. Although a slight charade catching them (as always!), they were placed in the beds to till the area and find some slugs. The next day I added our somewhat finished compost from last year and they did a solid job spreading it out.
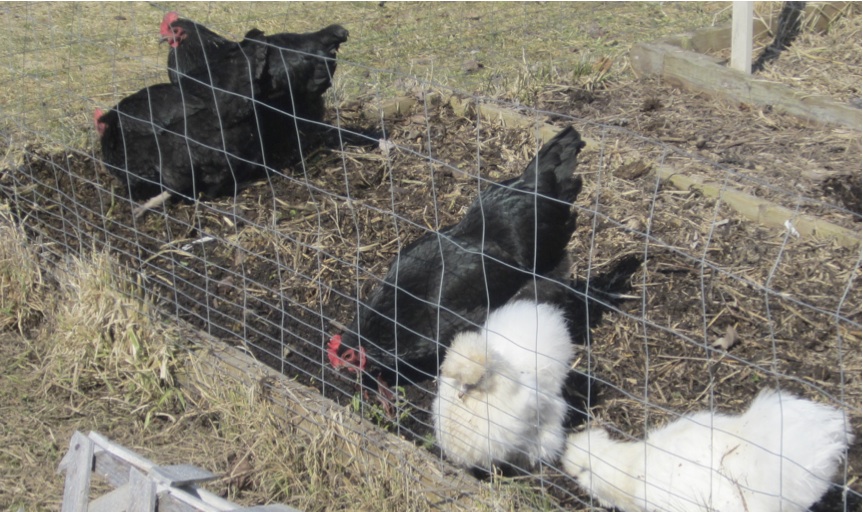
Spring: Chickens digging up slugs, spreading compost, and tilling beds.

The reins are ours,

Chris

Reflections, Hindsight, and Alterations:

  • Permaculture: Place garden in a high traffic area. For example, between your driveway and front door to maximize interaction. Pick stuff for dinner on your way in! It’s not a trudge to the corner of your lot to maintain your garden.
  • Permaculture: Use Hugelkurtur beds – woody debris and logs underneath layered organic matter. This skips the wood framed beds, saves money on materials, and utilizes local shrub & fallen tree waste (if applicable in your area).
  • Permaculture: Use more synergistic plants and food forest layouts.
  • Do 3.5’ wide beds: otherwise, it’s a pretty large space to hop over.
  • Instead of getting the manure, peat moss, and humus, we should have just gotten yards of certified compost from our municipality service (OCRRA compost). It would have been cheaper and less work. They offer wood chips to cover your plants and prevent weed maintenance, too! $15 for six yards of either compost or wood chips; you can mix and match. A yard is about a truck bed load.

Resources:


Replacing Rotting Door Wood: Rot to Not

How did I miss this?
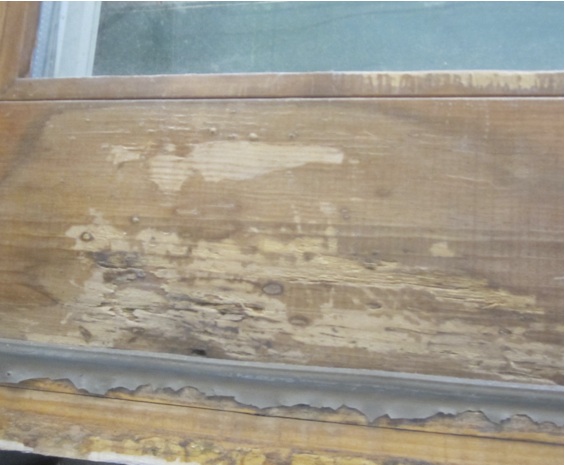
Time to Address This

The Judge

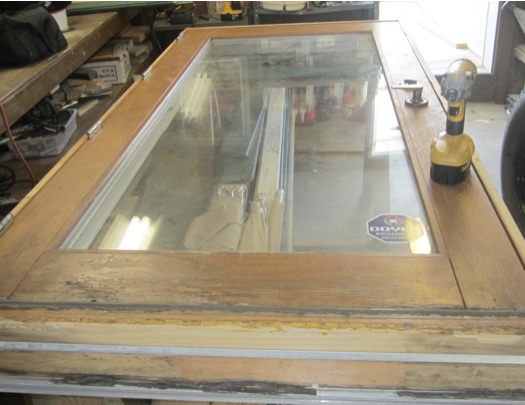
Michelle comes home to an awkwardly smiling Chris. Chris presents the door he drove 45 minutes to get. It was supposed to have built-in-blinds with a luscious and deep stained wooden interior. “Where are the blinds?” “Didn’t have them. Just this screen.” “Hmmm…that’s weird.” “Yea.” “Oh well, hey is that rotting?” Stumbling explanation ensues.

Rotten Altitude?

Up and up he hikes into…new territory once again. Now, he’s entered the land of rotting wood doors! Oh no! As always, it’s time to explore and try something new. It’s a slight bummer that I’ve needlessly brought it upon myself; however, let’s get this door back to something worth using, and also save my “deal of the century” reputation with Michelle.

Materials:

  • Piece of Wood
  • Wood Putty
  • Stain or Paint, Polyurethane, Brushes or Rollers
  • Biscuits for Joint Planer
  • Wood Glue

Tools:

  • Oscillating Tool or Multi-Tool
  • Chisel
  • Joint Planer
  • Brad Driver
  • Table Saw
  • 4 ft Clamps and Small Clamps
  • Oscillating Sander and Pads

Get Away Decay

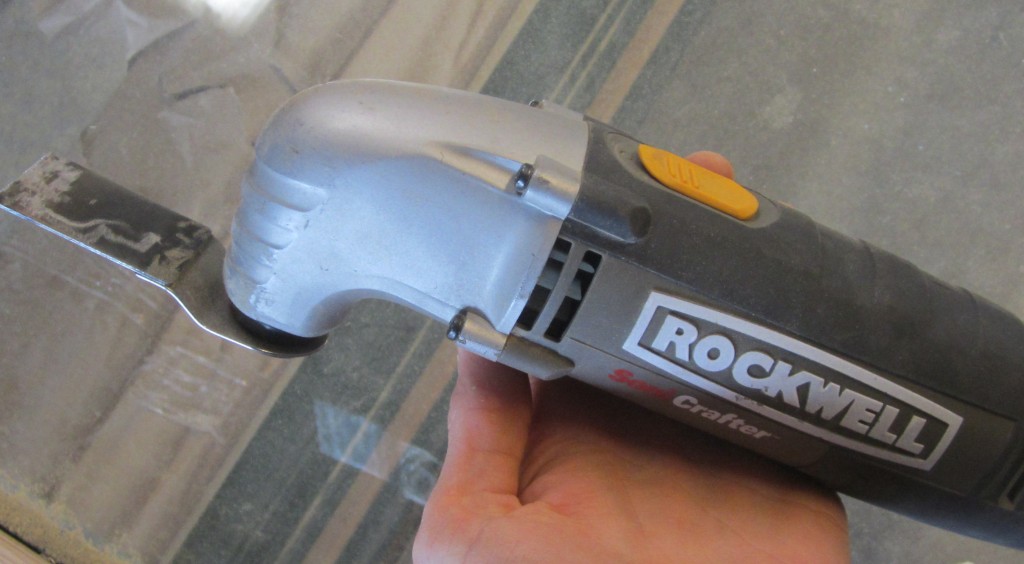
To remove the rot I checked out some online videos, and I saw people using an oscillating multi-tool. I didn’t have one, but my neighbor Michael Greenwood did. He was kind enough to lend me the tool; thanks Mike!

My Cutting Tool of Choice

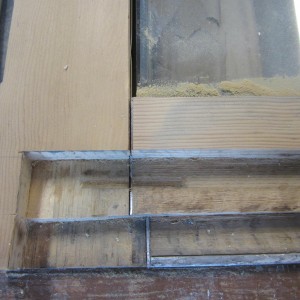
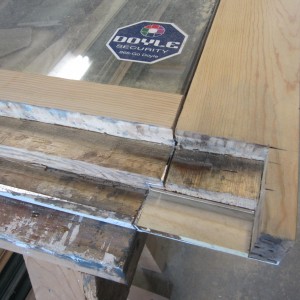
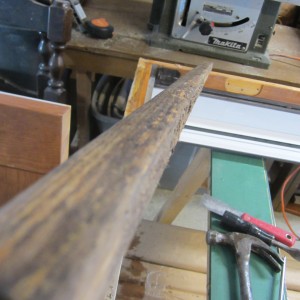
I originally intended to remove the entire bottom piece of framing wood; however, after removing layers of the door, I found that I couldn’t figure out how to remove the tempered glass (probably needed some heat applied to the seals) and I wasn’t sure if I really did want to remove it and make the seal weakened/have to reseal it well, so I decided to just cut out the bad parts. I created my guidelines as well as fastened a piece of wood to coax the oscillating cutter. I removed some good wood on one side so it matched the other side.

Cutting out the Rot
Cutting out the Rot
Right Side: This Door Came Free with Doyle Security
Right Side: This Door Came with Free Doyle Security

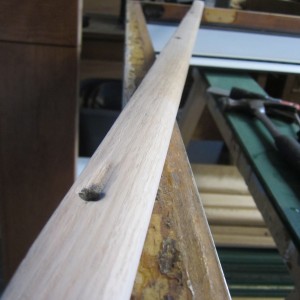
I also sanded the entire door and frame at this point. The bottom threshold piece was pretty beat up and I thought I’d have to replace it, but it was a nice hardwood and sanding it did the trick.


Door Threshold Piece
Sanding Magic
Sanding Magic

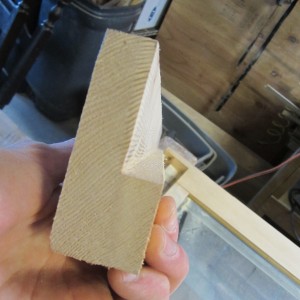
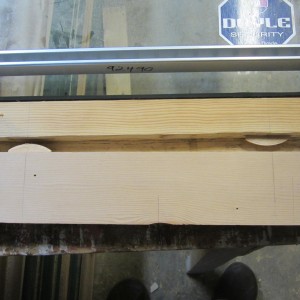
Once everything was sanded with my oscillating sander, I started to cut the replacement wood piece. I made this piece into an “L” shape; my plan was to have a two tier level replacement piece where I could have plane biscuits on each level for extra strength. This didn’t work out; the planer was too big to reach the bottom level on the door, so I didn’t get my overkill worth of strength.

Table Sawed "L" Piece of Wood
Table Sawed “L” Piece of Wood
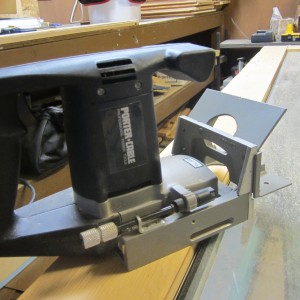
Joint Planer: Nice tool Pa introduced me to
Joint Planer: Nice tool Pa introduced me to. Use it for joining wood indiscreetly. I used it previously for a small table top. It’s just a sideways saw blade.

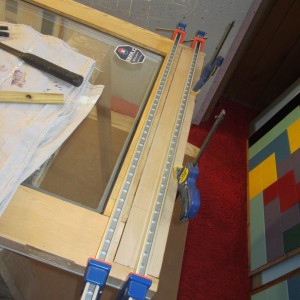
After dry fitting the piece, it was ready for a go. I moved the door inside the house to achieve proper temperatures for the wood glue. Step 1: Wood glue massacre. Step 2: Torture clamps!

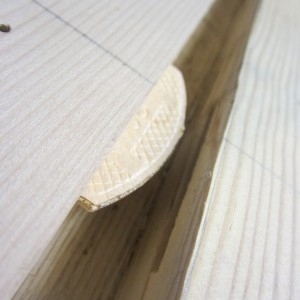
Joint Planer creates the right size holes for these wooden biscuits to be glued in.
The joint planer creates the right size holes for these wooden biscuits to be glued in.
Biscuit Close Up: It's smiling at you.
Biscuit Close Up: It’s smiling at you.
Torturing Wood. One of my hobbies.
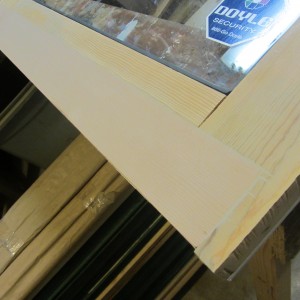
Fitted Piece with Putty

There were several imperfections during this entire process. While I was cutting the rotting piece out, I scratched the sides of the wood.

<img class="size-medium wp-image-287" src="http://www lipitor generic.oneidatrail.com/app/uploads/2014/07/IMG_2472-213×300.jpg” alt=”Oscillating Cutter Marks and Gap” width=”213″ height=”300″ />
Oscillating Cutter Marks and Gap

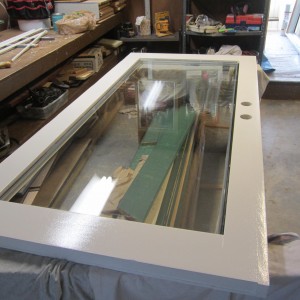
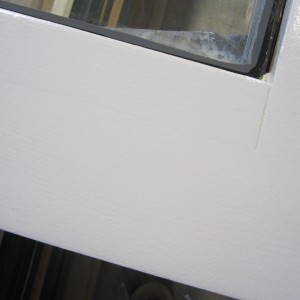
The cut replacement wood piece was a solid fit, but it left a small gap (mainly because I didn’t cut accurately and it was difficult to do it perfectly–I think I was using an old blade). I really wanted to keep the wood visible, but I failed to match the two types of wood and I didn’t even try to match the putty infill, so even with these going against me, I did a trial stain test anyway. Surprise, surprise, it looked like crap, so I had no choice but to paint it; thankfully, it looked great painted. I actually used an exterior paint on the bottom of the door to really help prevent moisture penetrating the wood again. The paint has two layers, and then I added two layers of polyurethane to seal it and prevent marking up the paint.

Painted Door
Painted Door
IMG_2514
Wood Putty Hid the Lines Well

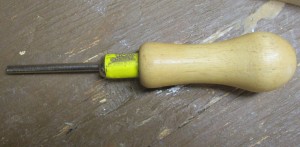
To reattach the trim pieces, which I also sanded and painted, I planned on borrowing dad’s small finishing nailer and compressor. He asked why I would haul all of that over for just a couple of quick nails and sent me home with a Brad driver. This little baby worked like a charm.

Brad Driver
Brad Driver
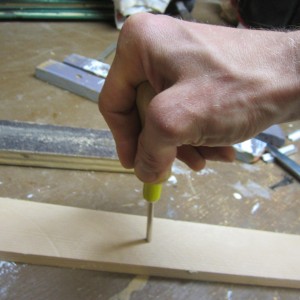
Simply press the finishing nails in.
Simply press the finishing nails in with any built up anger you’re holding on to.

Overall, I’m happy with the result even though there was a lot of adjustments made along the way. The door is tempered glass which will be good for a moving house, and it looks nice and new again; a little bummed I had to hide the wood grain with paint–I hate painting wood. I bought bottom door weatherstripping, and I still have to attach it, but this door is pretty much waiting for its home!

The reins are ours,

Chris

Categories: Building

Tiny House Planning: Window Bonanza: Deal of the Century Two

Tiny House Financial Stranger Angel

While purchasing new windows at Home Depot, a man says, “How much you paying for those five windows?” “100 each.” “Did you see the ad on craigslist on Teall Ave? Bet they got your size windows there.” “I’ll check it out.” Although I spent $500 for the windows I needed to get, I took the guys advice…and found all five similar size windows for $100 total! Brought the depot ones back! $400 bucks saved that day. Thank you tiny house angel.

Window Bonanza

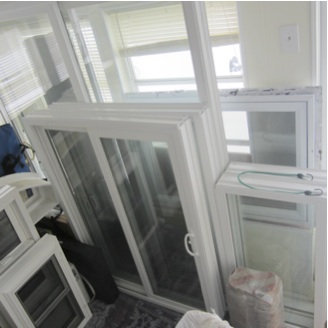
That stranger didn’t just lead me to $400 worth of savings–he lead me to securing windows for the house and the companion studio! We actually may have too many windows now, haha. Crazy! With a projected window cost between $800-3800 dollars, we have paid a total of $266 for twelve windows and a skylight—that’s $20.50 per window. We also have obtained our eleven windows for the companion studio at only $226–that’s 20.50 per window as well. Mainly, the score entailed showcase windows—a thing for tiny house builders to seek out.

Craigslist/Angel Advice Window Score

Although a stranger pushed me to check out the windows on Teall Ave, it was an ad on craigslist I glanced over. 80% of our windows and doors came from craigslist and the other 20% through Michelle’s builder/part-time boss’ network. Overall, the windows acquired ranged from $20-60 on craigslist after wheelin’ and dealin’ Extra resources.

Out of Business = Good Business

Leo A. Kline, a home improvement specialist since 1947, was going out of business, and it was good business for us. A kind man named Paul offered us a lot of deals for eighteen windows and a new sliding glass door (for the companion studio). Pa, my uncle and I went to pick up the windows and we also had to take down a display case as part of the deal with Paul. Scrapped the aluminum from the display case for $55, too. Four of the windows and the door are tempered glass, an added bonus. We paid around $16 per window. After consulting some tiny house sites, I found that a lot of people chose not to use tempered glass windows–Tiny Tack home included. Although it’s a good idea, it depends on how much you plan to travel and it’s too expensive for most tiny homebuilders, so it’s not fretted about.

Less Awesome

I bought an aluminum clad tempered glass door from someone for $100. Like an idiot, I didn’t inspect it well, and the wood was rotting at the bottom from the side I didn’t look at! Time to learn how to deal with rotting wood…at least I’ll have a winter project before the spring.

Needs some TLC.
Needs some TLC
How did I miss this?


The reins are ours,

Chris

Categories: Design, People